Projects
Just like the customer, you can't create a task without a project. It is from the project that the evaluation of the employees' work and the calculation of the profit from the work performed are made.
General information
In general, this is very similar to Customers, but in case you missed the previous point, let's repeat. You can view the contents of the Projects page in either a table or a poster style. There is quite a lot of information on each of them. There is no functional difference between the two styles, the only question is which one is more convenient for you to work with. You will always see the name of the project, the list of participants added to it, as well as brief information on the budget and the completion of the created tasks. Some of the information is presented in icons. Let's dwell on them again and figure out what is what. P or C - the type by which the budget will be calculated (by Project or by Customer). Hours or dollar sign - how the costs are measured, in hours or in currency. The next icon indicates the budget limit - unlimited, monthly, weekly or one-time. Next come the total numbers. For an unlimited budget, this is How much was spent for all time / and For the current month. For other budget types, it will be - How much was spent / How much is left (for a month, week, or total).
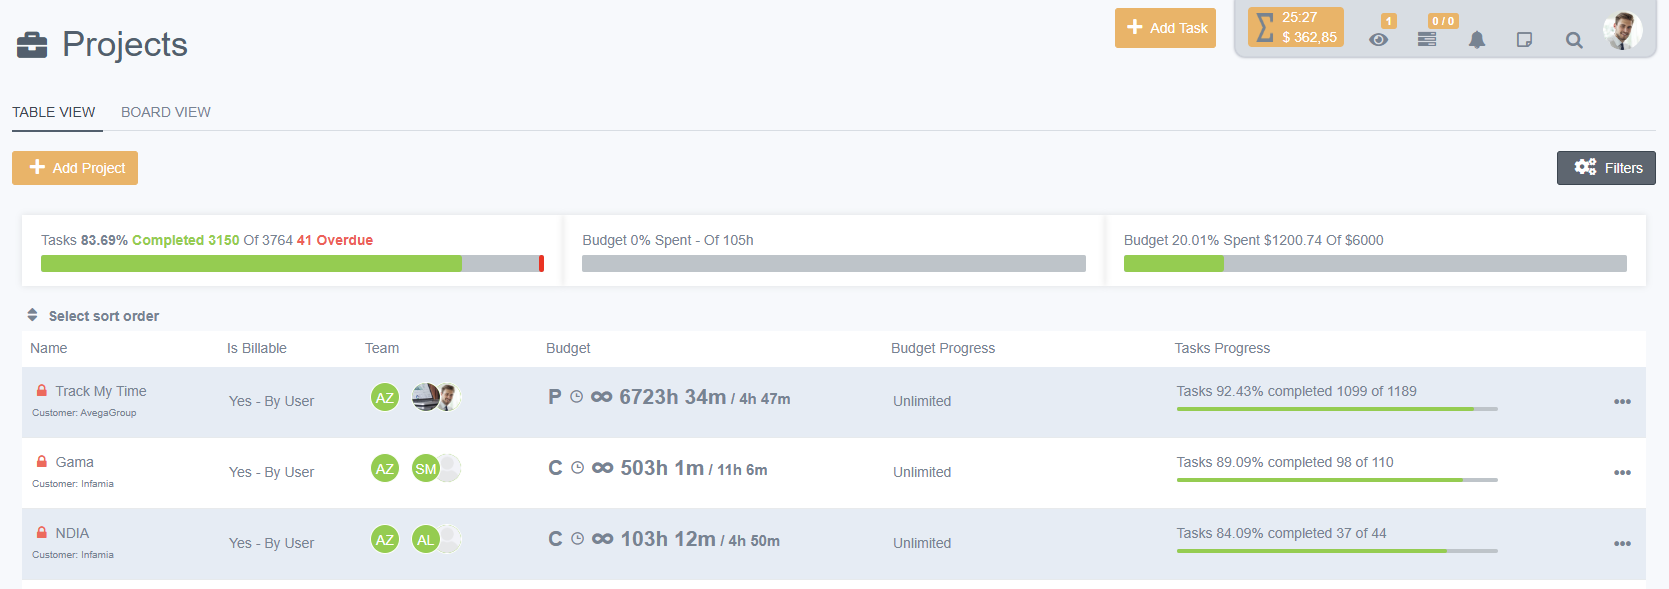
In addition to everything, there are three summary windows above the list of Projects. The first of them displays the total number of tasks for all projects, their completion percentage, as well as the number of those whose completion is overdue by the set completion date. The second - summary data for hourly budgets, the third - for monetary ones. If there are any, of course.

There are only two actions that can be performed with projects from the list. The first is to enter additional functionality and edit one of the projects. The second is to send to the archive. This is almost like deleting, with the only difference being that the projects can be viewed or even returned. To do this, you need to go to the filters and switch to the display of Archived projects. This is where you can return any project to the active state. When sending a project to the Archive, all its tasks will also be hidden.

Creation
To create a Project, you need to click the Add Project button. A dialog box will open in which you need to go through 4 steps.
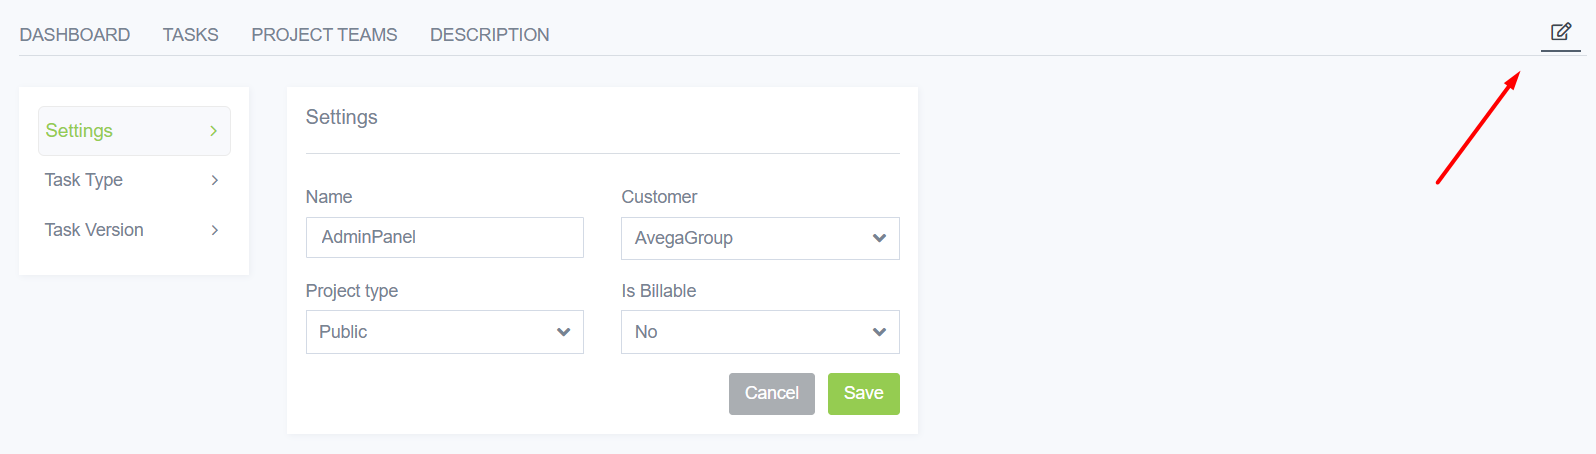
General - we set the name of the project, after which we must specify the Payable parameter. It indicates whether the project will be paid for by the customer, or it is an internal product. Next, you should select the Customer and Project Type. If everything is clear with the first, then the project type should be explained a little. A private project will be available only to administrators and those who have been added to the project team. Public will be available to all employees of the company (for regular users - only in read mode).
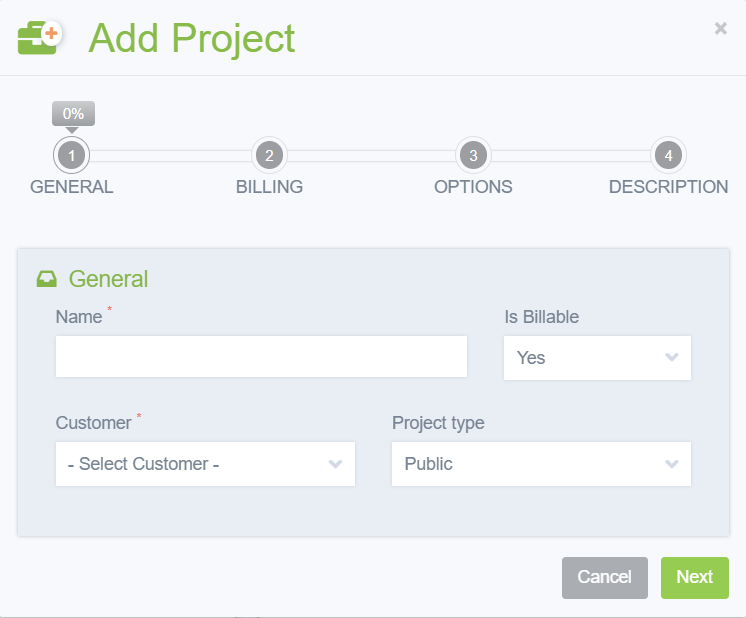
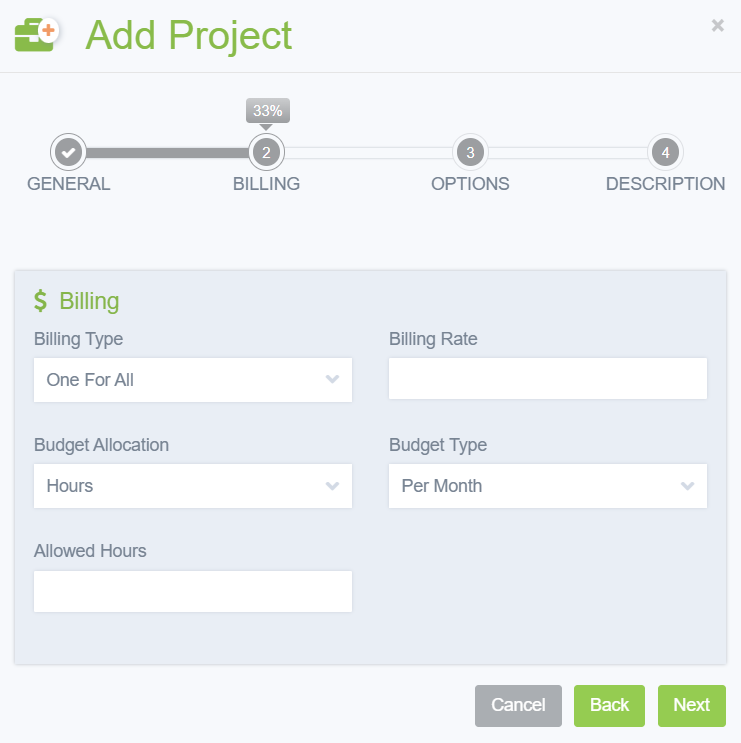
Billing - Billing Type - the method by which the cost of each employee's hour of work will be calculated. By User - data will be pulled from the profile of each specific user from the team individually. One For All - sets a single Payment Rate for all users of the project. Budget Distribution - how exactly the budget will be calculated, in money or hours. Budget Type - determines whether the budget will be unlimited or finite. If you select NOT unlimited, Budget Size appears, where the budget size for the specified period of time is indicated. Total is the general budget that has no time frame. That is, a one-time budget for the entire project.
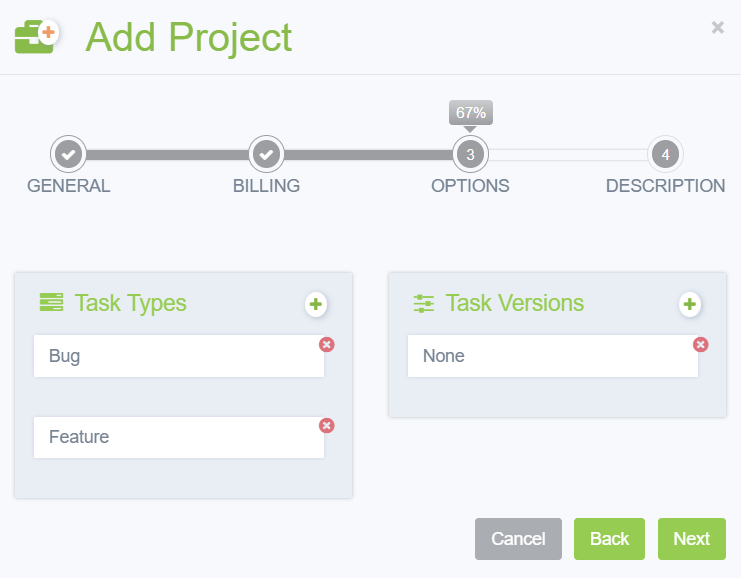
Options - Task types - these are the types your Tasks will be divided into within this project. By default, Bugs and Features are installed there, but you can change, create or delete any of them. Task versions - versions of Tasks in the project. If the project is planned to have many stages, this section will help you not to get confused and easily find the content you need.
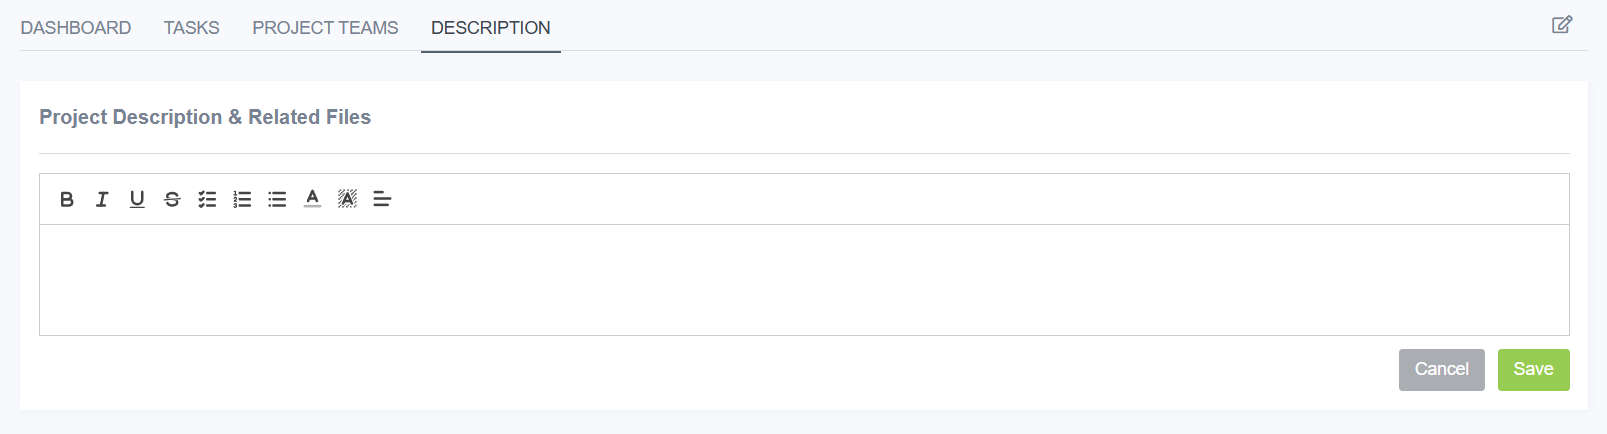
Description and related files - description of the project, with the ability to add screenshots, pictures or other files.
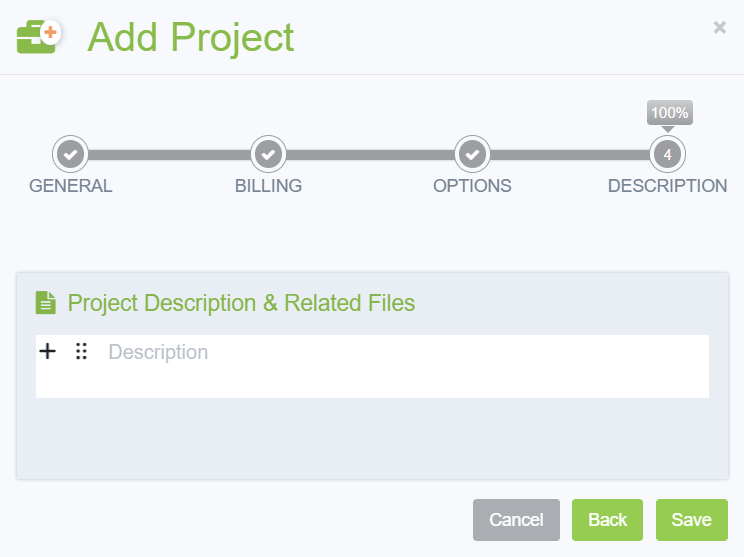
Next, all we have to do is click the Save button.
Details
We've already seen most of this in Customers, but let's review it.
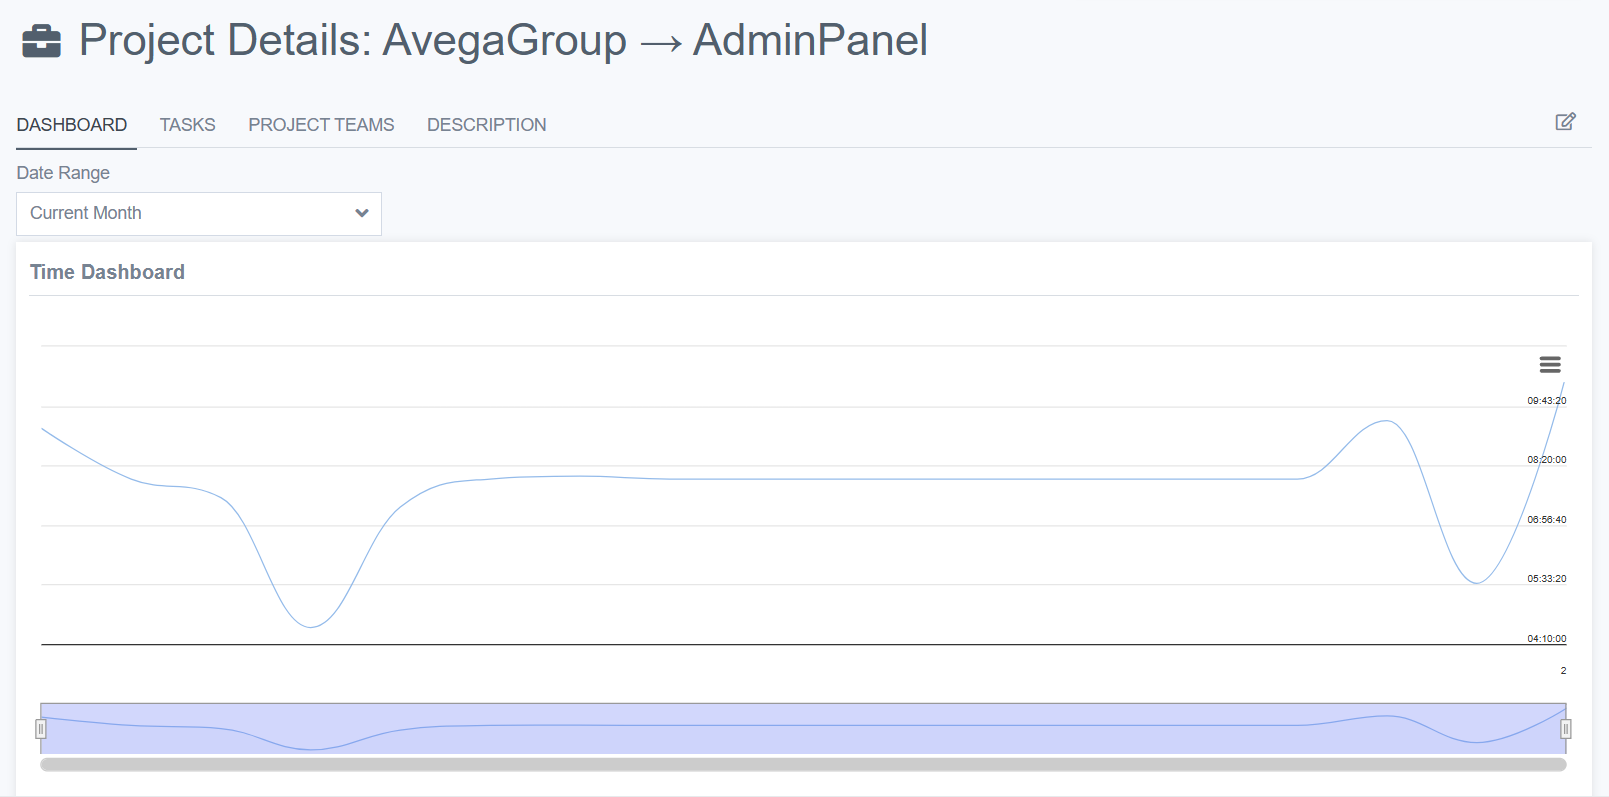
DASHBOARD - Information page. It displays data on tasks being performed, time spent, as well as income and payment to employees.
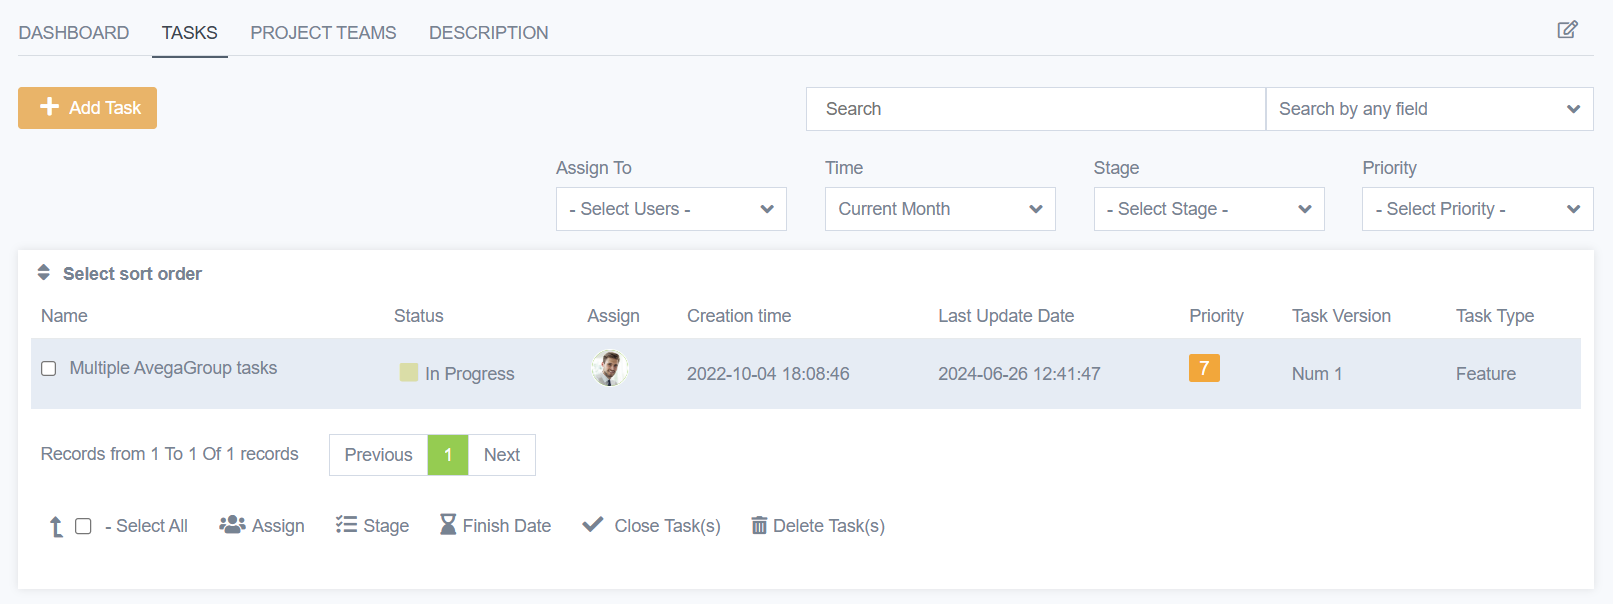
TASKS - tasks created within this project. If desired, you can create a task directly from here using the Add Task button. After clicking it, you will be redirected to the expanded creation page.
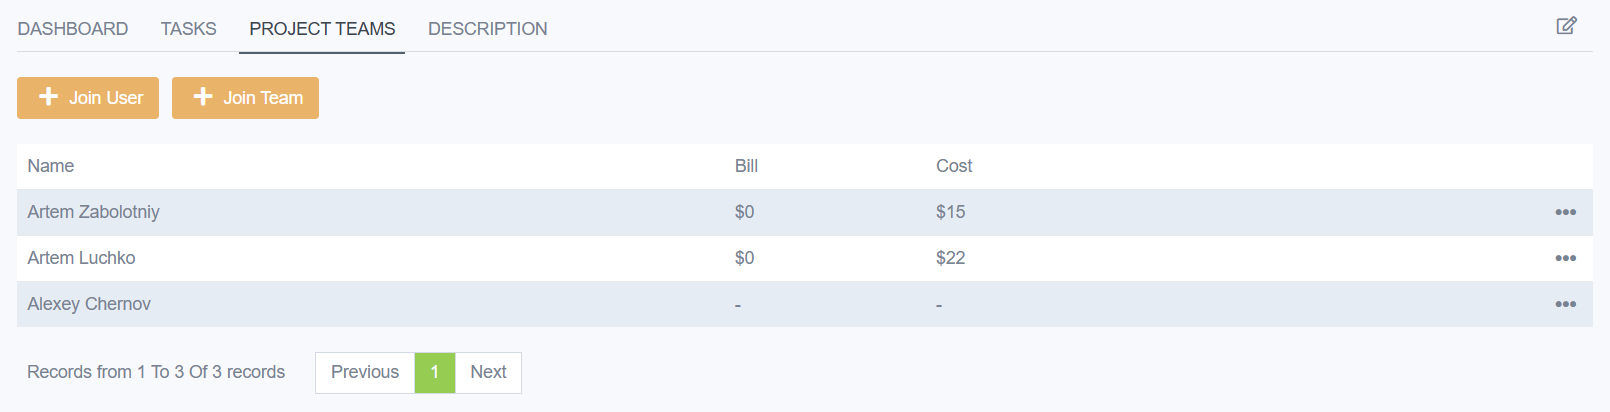
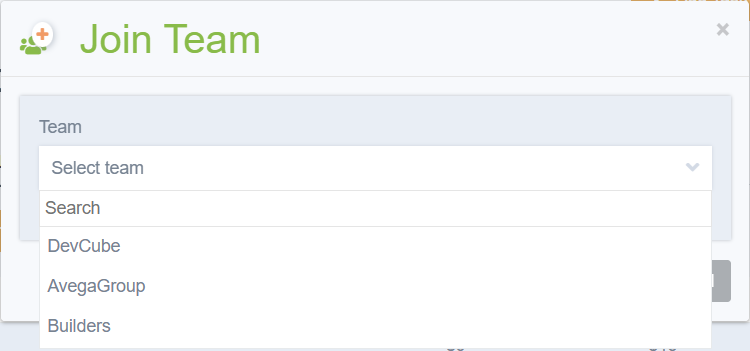
TEAM - Selected project teams. Here you can add either one user or a whole team. With combined addition, duplicate workers will not be added twice. Here you can set Bill and Cost for each worker for this project, and you can set different payments for different periods of time.
DESCRIPTION - Description and attached files.
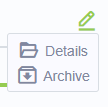
EDIT - The small icon on the left, remember? By clicking on it, we will see that all the fields that we went through when creating are stored here.