Tasks
The tracker is certainly the most important part of the functionality of our application, but you will probably spend no less time in this section. When there are a lot of tasks, you can start to get confused, for this reason, do not forget to use filters in order to make your work easier.
General information
So, what do we see in the task list?
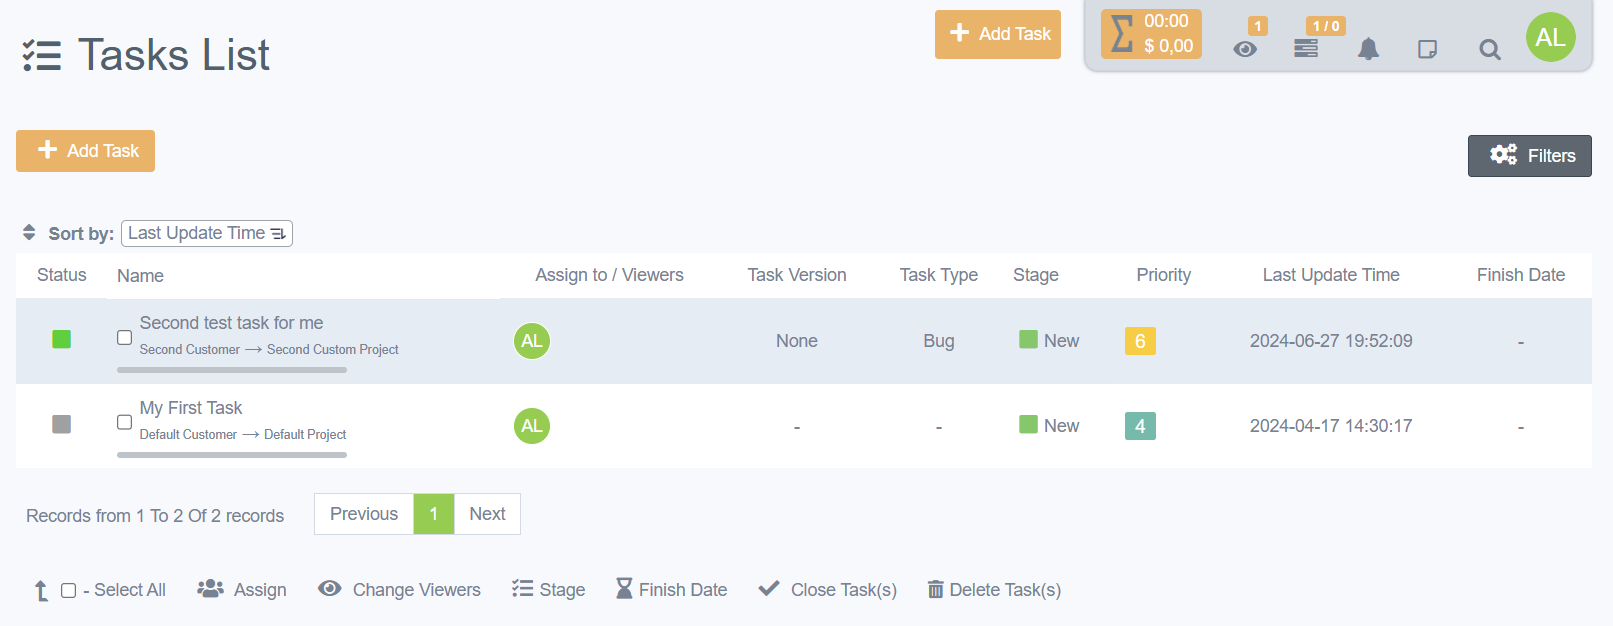
Status - the status of the Task. There are four options - gray, meaning that the end date has not been set. Green (by default) - there is still time left to complete the task. Orange (by default) - the set number of days are left before the end of the time to complete the task. Usually - 1. Red - there is no more time, the task is overdue.
Name - the name of the task, under which its project and customer are also indicated. All names are clickable, with the ability to go to the desired section.
Assigned to / Observers - This column indicates who the task is subscribed to, as well as who monitors the progress of the task (who receives notifications about changes).
Task Type - a specified type that can have both standard and specified values.
Stage - the status of the task
Priority - the priority set when creating/updating.
Latest change - date and time when the last changes were made.
Completion date - date by which the task must be completed.
It should be noted that there is a checkbox opposite each task. Thanks to them, you can select several tasks, then select one of the actions at the bottom of the page that will work on all selected tasks at once.
Creating from a task list
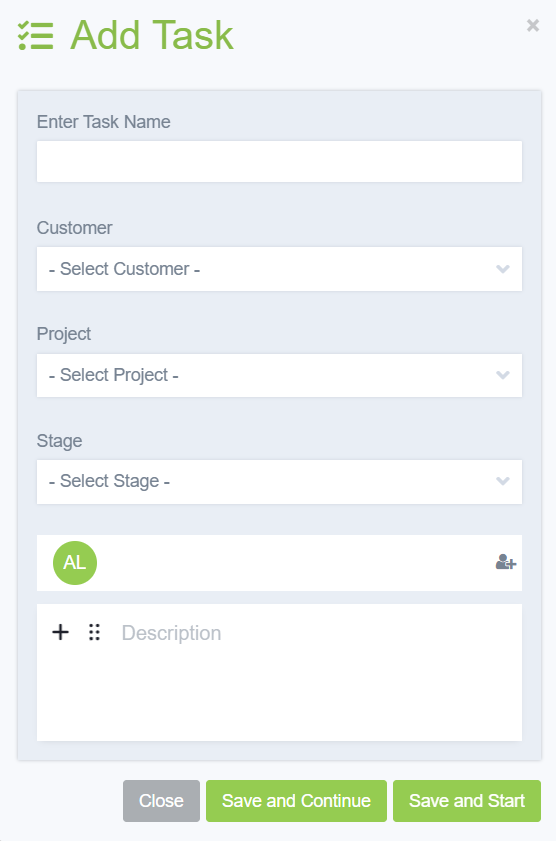
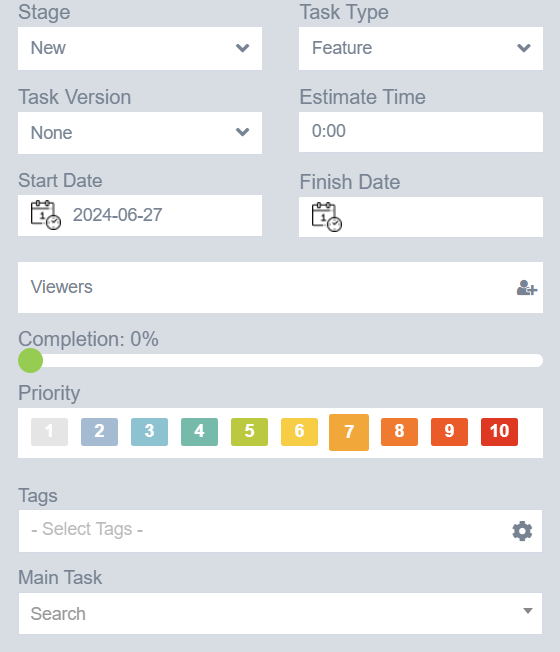
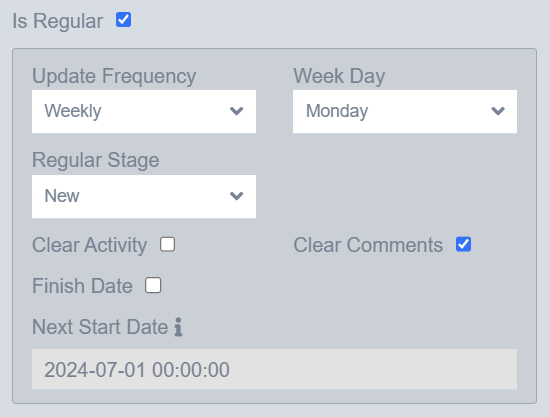
To create a Task, you need to click the Add Task button. You will be redirected to the detailed task creation page. Next, fill in the name. You can immediately select who to assign the task to, or you can first select the customer and project. When selecting a customer, only his list of projects will remain. When selecting a project, the list of workers available for assignment will immediately be reduced to those added to his team. The next step is to fill in the description. Here you can insert pictures, files, lists, code fragments, and so on. Task Type and Task Version are not required fields, but we strongly recommend filling them in, to make it easier to search in the future. The Task End Date is also optional, but if you leave it blank, the task will not be highlighted, remaining "gray" in the list, and will never appear in Processing. Next, you can add personnel who should monitor the progress of the work. If necessary, you can select the percentage of the task that has already been completed at the time of creation. Set the priority. If necessary, create/add tags, again for future search. Next, we can make this task a subtask of any other task. And the last thing is the ability to make the task regularly repeating. While this checkbox is checked, our task will return to its original status after a certain period of time. Additionally, you can set up the completion date, clear activity and comments.

After filling in all the fields, you can save the Task in two ways. By clicking the "Save" button, you will save the Task and immediately go to it with the ability to edit. By clicking the ">>" (Save and add more) button, you will save the Task and go to creating another one, while all the settings, except the name and description, will be saved, and you will not need to fill them in again. This is convenient when you need to create several tasks for one project.

Editing a task
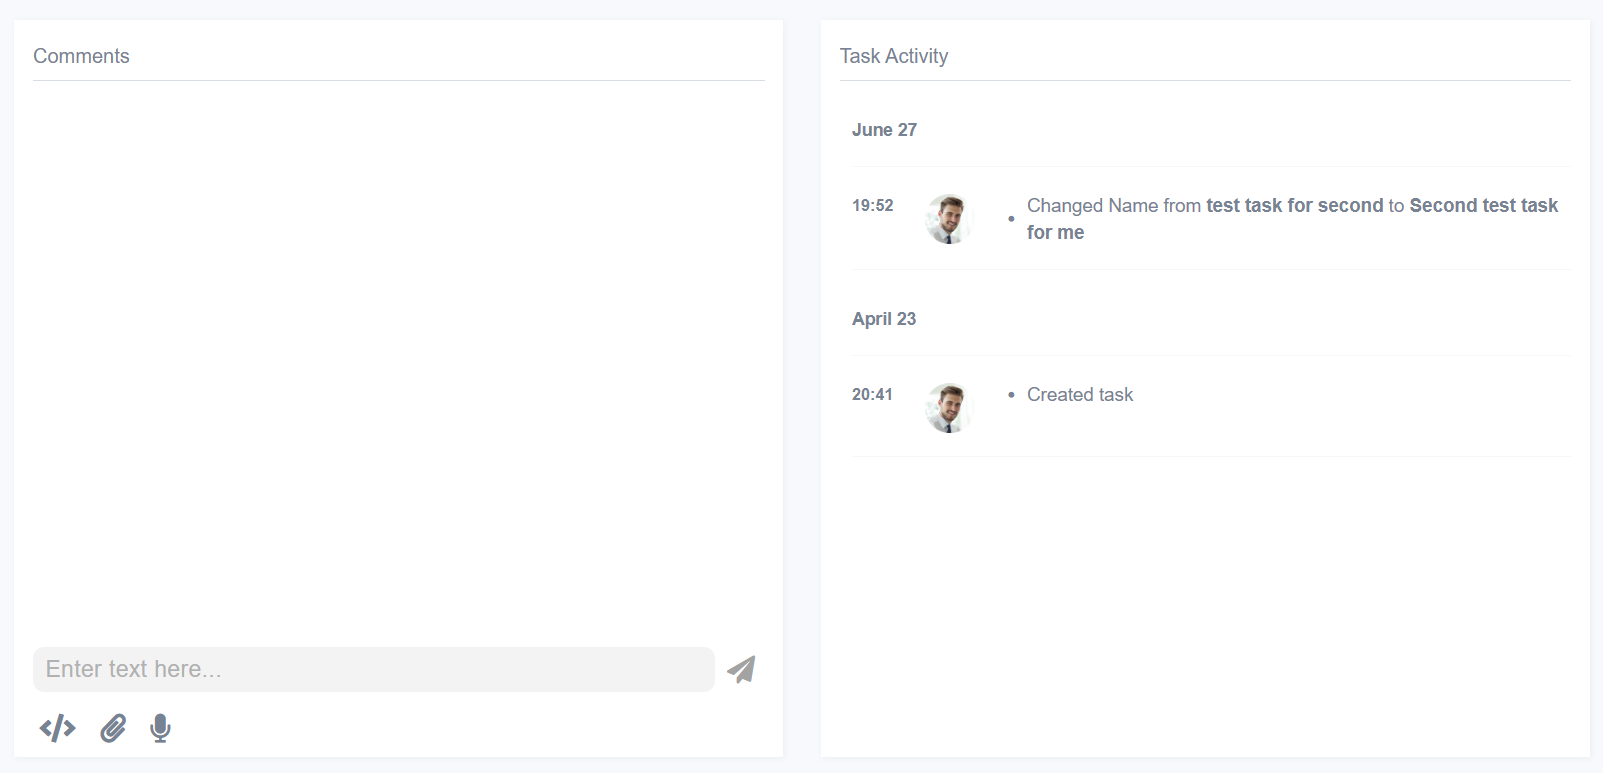
To open editing, just click on the Task name in the task list. When editing, most of the fields remain almost unchanged. The main thing that is added is chat and activity. We can leave our comments about the Task, attach files and leave voice messages. In addition, we can see who, when and what changes were made to this Task.
Creating with a quick button
There is also a quick way to create a task from almost anywhere in the project - this is the button near the top menu. In essence, it repeats the functionality of a regular creation, only in the most compressed form.